CloudPe users can create and manage Virtual Machines (VMs) programmatically using API. This guide walks through the complete process of creating a VM using OpenStack API, including selecting a flavor, an image, a network, and booting from a volume.
Prerequisites: You must have an Application Credential (ID + Secret) to generate an Auth Token. To generate one, Click Here for more details.
Note: Tokens expire after a set period. If you receive a 401 Unauthorized error at any step, re-run the token generation command and re-export $TOKEN.
Install Required Tools
Both curl and jq must be installed before proceeding.
Install curl
CentOS / RHEL / AlmaLinux / Rocky Linux
sudo yum install curl -y
Ubuntu / Debian
sudo apt update
sudo apt install curl -y
Install jq
Ubuntu / Debian
sudo apt update
sudo apt install -y jq
CentOS / RHEL / AlmaLinux
sudo yum install -y jq
Verify Installation:
jq –version
curl –version
Set Up Session Variables
Before running any commands, export your credentials as shell variables. This avoids copy-paste errors throughout all steps.
Generate and export your token:
TOKEN=$(curl -ksD – -o /dev/null \
-H ‘Content-Type: application/json’ \
-d ‘{
“auth”: {
“identity”: {
“methods”: [“application_credential”],
“application_credential”: {
“id”: “”,
“secret”: “”
}
}
}
}’ https://in-west2.controlcloud.app:5000/v3/auth/tokens \
| grep -i x-subject-token \
| awk ‘{print $2}’ \
| tr -d ‘\r’)
echo “Your Token: $TOKEN”
Then export it:
export TOKEN=”<token-from-above>”
Find and export your Project ID:
curl -ks \
-H “X-Auth-Token: $TOKEN” \
-H “X-Subject-Token: $TOKEN” \
“https://in-west2.controlcloud.app:5000/v3/auth/tokens” | jq ‘.token.project.id’
Step 1: Select a Flavor
A flavor defines the VM’s hardware specifications (CPU, RAM, Disk). You can list available flavors using:
curl -ks \
  -H "X-Auth-Token: $TOKEN" \
  "https://in-west2.controlcloud.app:8774/v2.1/$PROJECT_ID/flavors" | jq '.flavors[] | {id, name}'
This will return a list of flavors. Choose the required flavor ID.
e.g. :
“id”: “57d13e51-9c7d-49c1-9914-8febb9aadbfb”,
“name”: “a.gp1.4g”
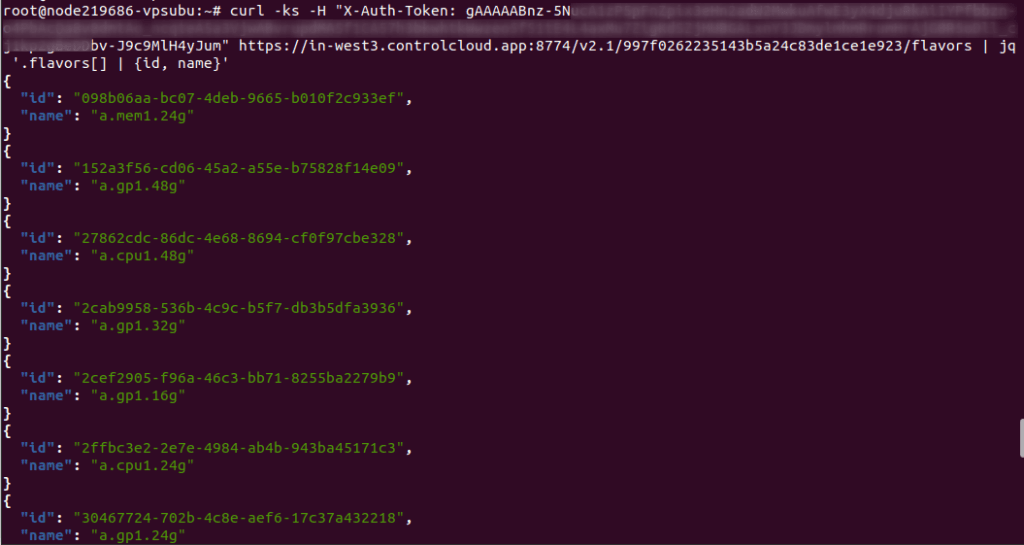
Export your chosen flavor ID:
export FLAVOR_ID=”<flavor-id>”
Step 2: Select an Image
To list available images:
curl -ks \
  -H "X-Auth-Token: $TOKEN" \
  "https://in-west2.controlcloud.app:9292/v2/images" | jq '.images[] | {id, name}'
Pick an image ID from the output.
e.g. :
“id”: “15e0ac15-0b12-4a38-abda-8d7625acace0”,
“name”: “AlmaLinux 9”
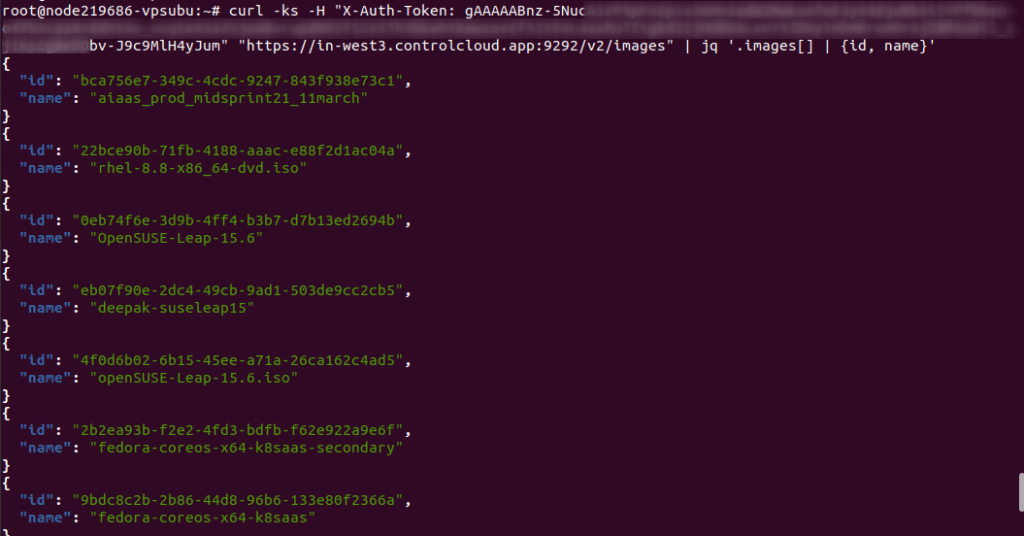
Export your chosen image ID:
export IMAGE_ID=”<image-id>”
Step 3: Create a Boot Volume
Create a Bootable Volume from an Image.
Note: Volume size must be at least 30 GB.
curl -ks -X POST \
  "https://in-west2.controlcloud.app:8776/v3/$PROJECT_ID/volumes" \
  -H "Content-Type: application/json" \
  -H "X-Auth-Token: $TOKEN" \
  -d '{
    "volume": {
      "size": 30,
      "name": "alma-boot-volume",
      "imageRef": "'"$IMAGE_ID"'",
      "volume_type": "default"
    }
  }'
From the response, copy the volume id and export it:
export VOLUME_ID="<volume-id-from-response>"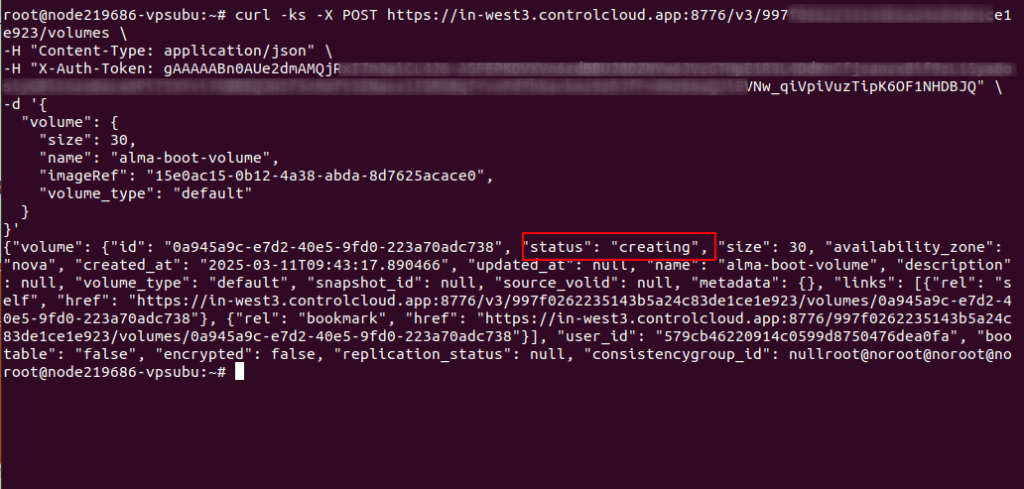
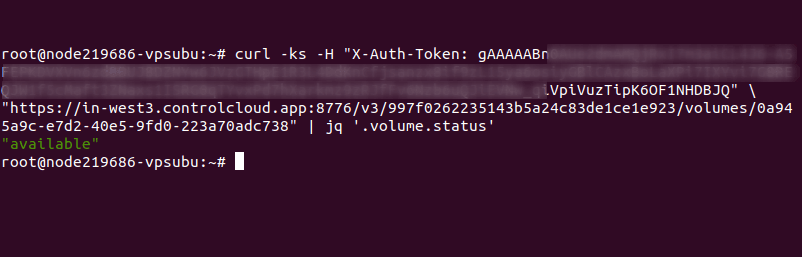
Wait Until the Volume is Ready. Run the following command to check the volume status:
curl -ks \
  -H "X-Auth-Token: $TOKEN" \
  "https://in-west2.controlcloud.app:8776/v3/$PROJECT_ID/volumes/$VOLUME_ID" | jq '.volume.status'
Note: If status shows null, wait 30 seconds and check again. The API may return null briefly while the volume is initializing. Do not proceed to the next step until status shows "available".
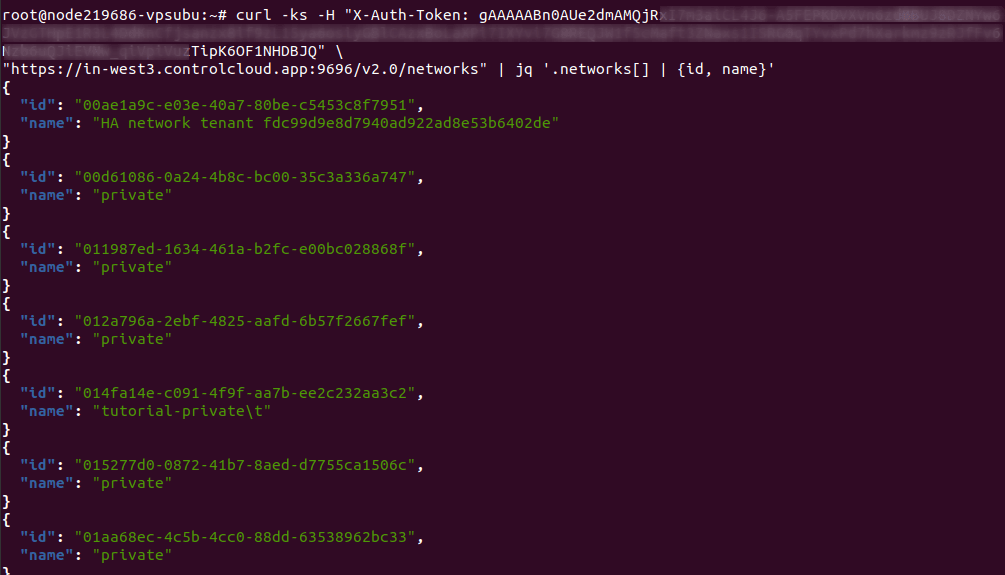
Step 4: Select a Network
To get available networks:
curl -ks \
  -H "X-Auth-Token: $TOKEN" \
  "https://in-west2.controlcloud.app:9696/v2.0/networks" | jq '.networks[] | {id, name}'
| Network Name | When to Use |
|---|---|
| public | Direct SSH access — no router or floating IP needed |
| Private | Private network — requires a router and floating IP for SSH (see Steps 6 and 7) |
Export your chosen network ID:
export NETWORK_ID=”<network-id>”
Step 5: Create the VM
Now, create a VM using the selected flavor, network, and boot volume:
Note: Replace my-alma-vm-usingAPI with your preferred VM name if needed.
curl -ks -X POST \
  "https://in-west2.controlcloud.app:8774/v2.1/$PROJECT_ID/servers" \
  -H "Content-Type: application/json" \
  -H "X-Auth-Token: $TOKEN" \
  -d '{
    "server": {
      "name": "my-alma-vm-usingAPI",
      "flavorRef": "'"$FLAVOR_ID"'",
      "networks": [{"uuid": "'"$NETWORK_ID"'"}],
      "block_device_mapping_v2": [{
        "boot_index": 0,
        "uuid": "'"$VOLUME_ID"'",
        "source_type": "volume",
        "destination_type": "volume",
        "delete_on_termination": false
      }]
    }
  }'
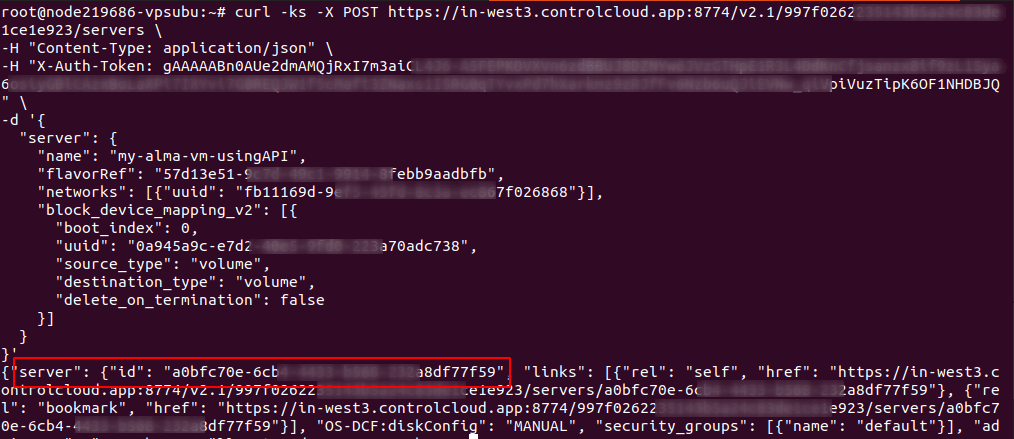
From the response, export the server ID:
export SERVER_ID=”<id-from-response>”
⚠️ Save the adminPass from the response immediately — it is shown only once and cannot be retrieved later.
Step 6: Check VM Status
curl -ks \
-H “X-Auth-Token: $TOKEN” \
“https://in-west2.controlcloud.app:8774/v2.1/$PROJECT_ID/servers/$SERVER_ID” | jq ‘.server | {id, name, status}’
| Status | Meaning |
|---|---|
| `BUILD` | VM is being created — wait 1–2 minutes and check again |
| `ACTIVE` | VM is ready ✅ |
| `ERROR` | Something went wrong

---

## Step 7: Set Up a Router (Private Network Only)

> Skip this step if you chose the `public` network in Step 4.

A floating IP can only be assigned to a VM on a private network if a **router** connects that private network to the public network. Without a router, the floating IP assignment will fail silently.
Step 7.1 — Create a router with public network as gateway:
curl -ks -X POST \
“https://in-west2.controlcloud.app:9696/v2.0/routers” \
-H “Content-Type: application/json” \
-H “X-Auth-Token: $TOKEN” \
-d ‘{
“router”: {
“name”: “my-router”,
“admin_state_up”: true,
“external_gateway_info”: {
“network_id”: “‘”$NETWORK_ID”‘”
}
}
}’ | jq ‘.router | {id, name, status}’
Export the router ID:
export ROUTER_ID=”<router-id-from-response>”
Step 7.2 — Get your VM’s subnet ID:
curl -ks \
-H “X-Auth-Token: $TOKEN” \
“https://in-west2.controlcloud.app:9696/v2.0/ports?device_id=$SERVER_ID” | jq ‘.ports[] | {id, fixed_ips}’
Export the port ID and subnet ID:
export PORT_ID=”<port-id-from-response>”
export SUBNET_ID=”<subnet-id-from-fixed-ips>”
If you want detailed information about each server:
Step 7.3 — Attach the private subnet to the router:
curl -ks -X PUT \
“https://in-west2.controlcloud.app:9696/v2.0/routers/$ROUTER_ID/add_router_interface” \
-H “Content-Type: application/json” \
-H “X-Auth-Token: $TOKEN” \
-d ‘{
“subnet_id”: “‘”$SUBNET_ID”‘”
}’ | jq ‘{subnet_id: .subnet_id, port_id: .port_id}’
A successful response will return the subnet_id and port_id — confirming the subnet is now attached to the router.
Step 8: Assign a Floating IP (Private Network Only)
Skip this step if you chose the public network in Step 4.
Step 8.1 — List available floating IPs:
curl -ks \
-H “X-Auth-Token: $TOKEN” \
“https://in-west2.controlcloud.app:9696/v2.0/floatingips” | jq ‘.floatingips[] | {id, floating_ip_address, status}’
A status of DOWN means the floating IP is available and unassigned.
Export the floating IP ID:
Step 8.2 — Associate the floating IP to your VM:
curl -ks -X PUT \
“https://in-west2.controlcloud.app:9696/v2.0/floatingips/$FLOATING_IP_ID” \
-H “Content-Type: application/json” \
-H “X-Auth-Token: $TOKEN” \
-d ‘{
“floatingip”: {
“port_id”: “‘”$PORT_ID”‘”
}
}’ | jq ‘{floating_ip_address: .floatingip.floating_ip_address, status: .floatingip.status, fixed_ip: .floatingip.fixed_ip_address}’
Step 8.3 — Verify the floating IP status:
curl -ks \
-H “X-Auth-Token: $TOKEN” \
“https://in-west2.controlcloud.app:9696/v2.0/floatingips/$FLOATING_IP_ID” | jq ‘{floating_ip_address: .floatingip.floating_ip_address, status: .floatingip.status}’
Wait until status shows ACTIVE before attempting SSH.
Step 9: Connect via SSH
For public network VMs — use the IP address shown in the server details:
curl -ks \
-H “X-Auth-Token: $TOKEN” \
“https://in-west2.controlcloud.app:8774/v2.1/$PROJECT_ID/servers/$SERVER_ID” | jq ‘.server.addresses’
For private network VMs — use the floating IP:
ssh almalinux@<floating-ip-address>
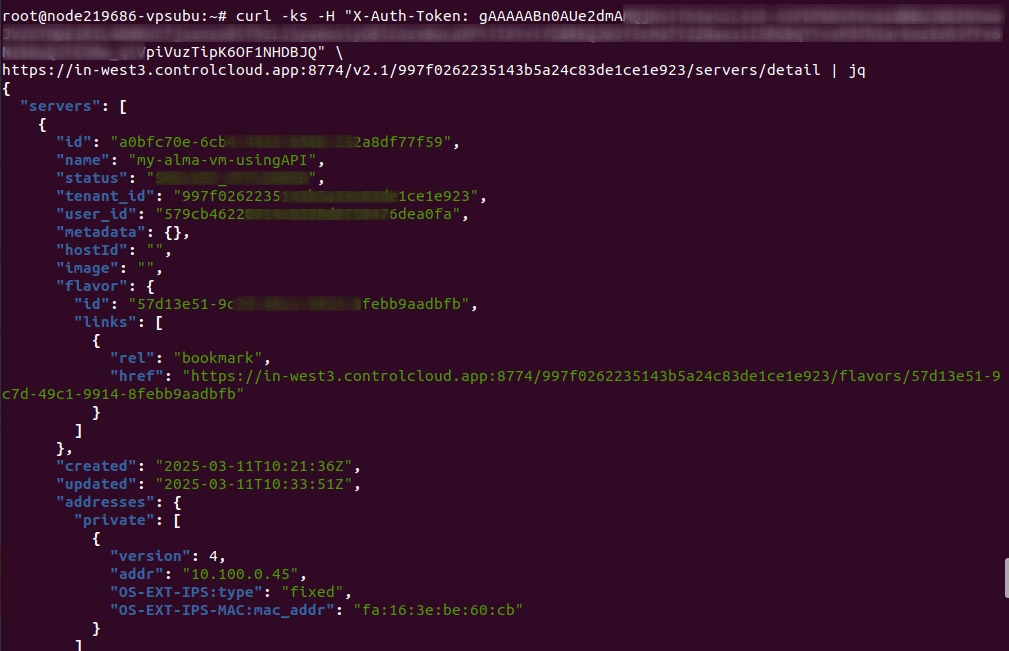
Step 10: List Detailed Server Information
curl -ks \
-H “X-Auth-Token: $TOKEN” \
“https://in-west2.controlcloud.app:8774/v2.1/$PROJECT_ID/servers/detail” | jq
Troubleshooting
VM stuck in BUILD state Wait 2–3 minutes and run the status check again. Large images may take longer to boot.
VM goes to ERROR state Contact CloudPe support with your Server ID and the approximate time of creation:
echo $SERVER_IDFloating IP shows all null values after association A router is not set up between your private network and the public network. Complete Step 7 before attempting floating IP assignment.
Getting 401 Unauthorized at any step Your token has expired. Regenerate and re-export:
export TOKEN="<new-auth-token>"jq returns Cannot iterate over null The API returned an empty or error response. Remove | jq from the command to see the raw response and identify the actual error.
Wrong Project ID Verify your real Project ID:
curl -ks \
-H “X-Auth-Token: $TOKEN” \
-H “X-Subject-Token: $TOKEN” \
“https://in-west2.controlcloud.app:5000/v3/auth/tokens” | jq ‘.token.project.id’
Cleanup / Delete Resources
When you no longer need the VM, delete it and its associated resources to avoid unnecessary charges. Follow this order:
1. Disassociate the floating IP:
curl -ks -X PUT \
“https://in-west2.controlcloud.app:9696/v2.0/floatingips/$FLOATING_IP_ID” \
-H “Content-Type: application/json” \
-H “X-Auth-Token: $TOKEN” \
-d ‘{“floatingip”: {“port_id”: null}}’
2. Remove subnet from router:
curl -ks -X PUT \
“https://in-west2.controlcloud.app:9696/v2.0/routers/$ROUTER_ID/remove_router_interface” \
-H “Content-Type: application/json” \
-H “X-Auth-Token: $TOKEN” \
-d ‘{“subnet_id”: “‘”$SUBNET_ID”‘”}’
3. Delete the router:
curl -ks -X DELETE \
“https://in-west2.controlcloud.app:9696/v2.0/routers/$ROUTER_ID” \
-H “X-Auth-Token: $TOKEN”
4. Delete the VM:
curl -ks -X DELETE \
“https://in-west2.controlcloud.app:8774/v2.1/$PROJECT_ID/servers/$SERVER_ID” \
-H “X-Auth-Token: $TOKEN”
5. Wait until the VM is fully deleted, then delete the volume:
curl -ks -X DELETE \
“https://in-west2.controlcloud.app:8776/v3/$PROJECT_ID/volumes/$VOLUME_ID” \
-H “X-Auth-Token: $TOKEN”
6. Release the floating IP:
curl -ks -X DELETE \
“https://in-west2.controlcloud.app:9696/v2.0/floatingips/$FLOATING_IP_ID” \
-H “X-Auth-Token: $TOKEN”
Conclusion:
This guide covered:
Cleaning up all resources when done
Installing prerequisites (curl, jq)
Generating an auth token using application credentials
Setting up session variables to avoid errors
Selecting a flavor, image, and network
Creating a boot volume
Deploying a VM using the CloudPe API
Setting up a router for private network connectivity
Assigning a floating IP for SSH access
Connecting to the VM via SSH