This article explains how to add a secondary IP address to a Windows Server using the Graphical User Interface (GUI).
⚙️ Prerequisites
- You must have Administrator privileges on the server.
⚠️ Note: If your adapter is set to DHCP (Obtain an IP address automatically), the Add option will be greyed out.
You must first convert your adapter to use a static IP before adding a secondary address.
📋 Step-by-Step Procedure
Step 1 – Open Network Connections
- Click on the Start Menu → Control Panel.
- In Control Panel, select Network and Sharing Center.
- On the left-hand side, click Change adapter settings.
→ This opens the window showing all your network adapters (e.g., Ethernet, Local Area Connection).
Step 2 – Open Network Adapter Properties
- Right-click your active adapter (e.g.,
EthernetorLocal Area Connection) - Select Properties
Step 3 – Open IPv4 Settings
- Select Internet Protocol Version 4 (TCP/IPv4) from the list
- Click Properties
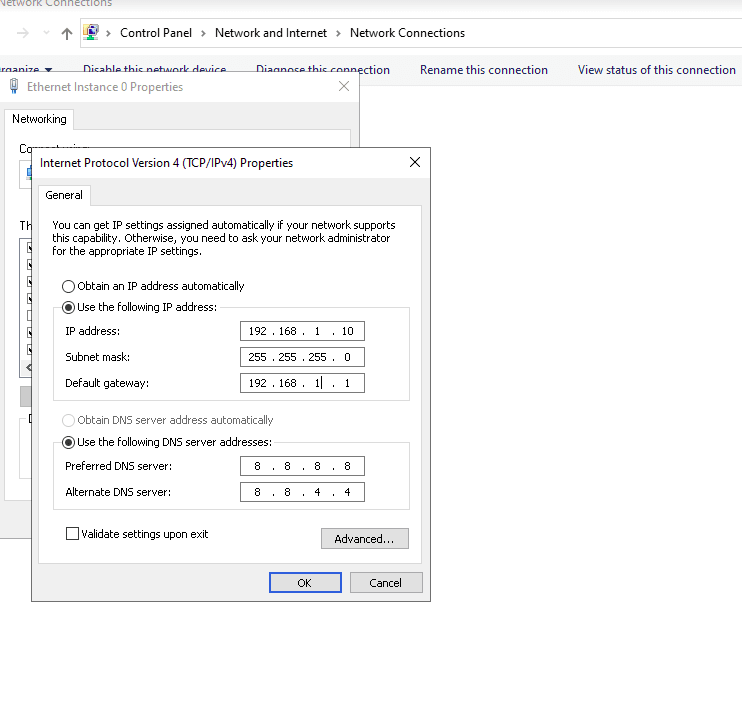
Step 4 – Change from DHCP to Static IP
- Select the option:
⚪ Use the following IP address - Enter your current network details (as seen earlier when DHCP was enabled):
- IP address: (e.g.,
192.168.1.10) - Subnet mask: (e.g.,
255.255.255.0) - Default gateway: (as per your network)
- IP address: (e.g.,
- (Optional) Add your DNS server details
💡 Tip: You can find these values by running
ipconfig /allbefore disabling DHCP.
Step 5 – Add the Secondary IP
- Click Advanced…
- Under the IP addresses section, click Add
- In the popup window, enter:
- IP address: Your new secondary IP (e.g.,
192.168.1.20) - Subnet mask: (e.g.,
255.255.255.0)
- IP address: Your new secondary IP (e.g.,
- Click Add, then OK on all windows to save.
Step 6 – Verify Configuration
- Open Command Prompt
- Run:
ipconfig /all - Under your network adapter, you should now see two IP addresses:
- Primary IP: 192.168.1.10
- Secondary IP: 192.168.1.20